Download File 🗹 https://blltly.com/2uUC1y
Human Evolution Clicker Mod APK Download: A Fun and Educational Game
Do you love games that are both fun and educational? Do you want to explore the history of life on Earth and create your own unique species? If yes, then you should try Human Evolution Clicker, a game that lets you experience the evolution of humans and other creatures from the simplest organisms to the most advanced civilizations. And if you want to enjoy the game without any limitations, you should download Human Evolution Clicker mod apk, a modified version of the game that gives you unlimited money, gems, and other benefits. In this article, we will tell you what Human Evolution Clicker is, how to play it, why you should download Human Evolution Clicker mod apk, how to download and install it, and what features it offers. Let’s get started!
What is Human Evolution Clicker?
Human Evolution Clicker is a casual simulation game developed by WAZZAPPS, a company that specializes in creating games that are entertaining and educational. The game was released in 2018 and has since gained millions of downloads and positive reviews from players around the world. The game is available for free on Google Play Store, but it also contains in-app purchases that can enhance your gaming experience.
How to play Human Evolution Clicker
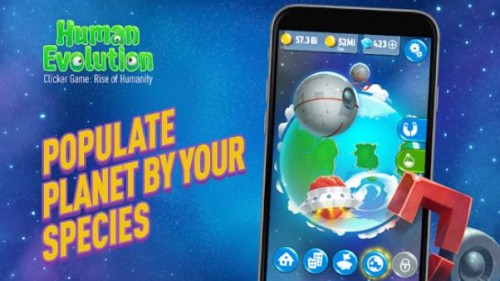
The gameplay of Human Evolution Clicker is simple and intuitive. You start with a single-celled organism and tap on it to create more cells. Then, you can combine two cells of the same type to create a new creature. You can also drag and drop creatures to merge them into more complex forms. As you progress through the game, you will unlock different stages of evolution, such as bacteria, fish, reptiles, mammals, birds, humans, cyborgs, aliens, and more. You can also explore different planets and dimensions, where you can find new creatures and environments. The game is endless, so you can create as many species as you want and see how they evolve over time.
Why download Human Evolution Clicker mod apk?
While Human Evolution Clicker is a fun and educational game, it also has some drawbacks that can affect your enjoyment. For example, the game can be quite slow and repetitive at times, especially when you have to wait for your money and gems to accumulate. Money and gems are the main currencies in the game, which you can use to buy upgrades, boosters, skins, and other items. However, they are not easy to earn in the game, unless you watch ads or spend real money. Moreover, the game also has annoying ads and pop-ups that can interrupt your gameplay and waste your time.
That’s why downloading Human Evolution Clicker mod apk is a good idea if you want to enjoy the game without any limitations or distractions. Human Evolution Clicker mod apk is a modified version of the game that gives you unlimited money, gems, and other benefits that can make your gameplay more fun and exciting. You can also access all the stages and creatures in the game without having to unlock them manually. Plus, you don’t have to worry about any ads or pop-ups that can ruin your gaming experience.
How to download and install Human Evolution Clicker mod apk
If you are interested in downloading Human Evolution Clicker mod apk, you can follow these simple steps:
Step 1: Download the mod apk file
The first thing you need to do is to download the mod apk file from a reliable source. You can use this link to download the latest version of Human Evolution Clicker mod apk. The file size is about 50 MB, so make sure you have enough space on your device.
Step 2: Enable unknown sources on your device
Before you can install the mod apk file, you need to enable unknown sources on your device. This is a security feature that prevents the installation of apps from sources other than the official app store. To enable unknown sources, go to your device settings, then security, then toggle on the option that says “allow installation of apps from unknown sources”. You may also need to grant permission to your browser or file manager to install the mod apk file.
Step 3: Install the mod apk file
Once you have enabled unknown sources and downloaded the mod apk file, you can proceed to install it. To do this, locate the file in your downloads folder or wherever you saved it, then tap on it to start the installation process. Follow the instructions on the screen and wait for the installation to complete.
Step 4: Enjoy the game
After the installation is done, you can launch the game and enjoy it with all the mod features. You will see that you have unlimited money and gems, no ads and pop-ups, all stages and creatures unlocked, and high-quality graphics and sound effects. You can now play Human Evolution Clicker without any limitations or distractions.
Features of Human Evolution Clicker mod apk
As we mentioned earlier, Human Evolution Clicker mod apk offers many features that can enhance your gaming experience. Here are some of the main features of Human Evolution Clicker mod apk:
Unlimited money and gems
Money and gems are the main currencies in Human Evolution Clicker, which you can use to buy upgrades, boosters, skins, and other items. However, they are not easy to earn in the game, unless you watch ads or spend real money. With Human Evolution Clicker mod apk, you don’t have to worry about that anymore. You will have unlimited money and gems at your disposal, which means you can buy anything you want in the game without any restrictions.
No ads and pop-ups
Another annoying thing about Human Evolution Clicker is the ads and pop-ups that can interrupt your gameplay and waste your time. They can also consume your data and battery life. With Human Evolution Clicker mod apk, you don’t have to deal with that anymore. You will have no ads and pop-ups in the game, which means you can play without any interruptions or distractions.
All stages and creatures unlocked
One of the most exciting aspects of Human Evolution Clicker is exploring different stages of evolution and creating new creatures. However, some of these stages and creatures are locked in the game, which means you have to unlock them manually by playing or paying. With Human Evolution Clicker mod apk, you don’t have to do that anymore. You will have all stages and creatures unlocked in the game, which means you can access them anytime you want without any hassle.
High-quality graphics and sound effects
Human Evolution Clicker is a game that has high-quality graphics and sound effects that make it more realistic and immersive. The game has colorful and detailed graphics that show the diversity of life on Earth and beyond. The game also has funny and catchy sound effects that add humor and fun to the gameplay. With Human Evolution Clicker mod apk, you will enjoy these features even more, as they are enhanced and optimized for your device.
Conclusion
Human Evolution Clicker is a fun and educational game that lets you experience the evolution of humans and other creatures from the simplest organisms to the most advanced civilizations. The game is easy to play but hard to master, as it requires creativity and strategy. The game is also entertaining and informative, as it teaches you about biology, history, science fiction, and more. However, the game also has some drawbacks that can affect your enjoyment, such as slow and repetitive gameplay, limited resources, annoying ads and pop-ups, and locked stages and creatures.
That’s why downloading Human Evolution Clicker mod apk is a good idea if you want to enjoy the game without any limitations or distractions. Human Evolution Clicker mod apk is a modified version of the game that gives you unlimited money, gems, and other benefits that can make your gameplay more fun and exciting. You can also access all stages and creatures in the game without having to unlock them manually. Plus, you don’t have to worry about any ads or pop-ups that can ruin your gaming experience.
If you are interested in downloading Human Evolution Clicker mod apk, you can follow the simple steps we provided above. You just need to download the mod apk file from a reliable source, enable unknown sources on your device, install the mod apk file, and enjoy the game with all the mod features. You will see that Human Evolution Clicker mod apk is a fun and educational game that you will love.
FAQs
Here are some of the frequently asked questions about Human Evolution Clicker mod apk:
Q: Is Human Evolution Clicker mod apk safe to download and install?
A: Yes, Human Evolution Clicker mod apk is safe to download and install, as long as you use a reliable source and follow the instructions carefully. The mod apk file does not contain any viruses or malware that can harm your device or data. However, you should always be careful when downloading and installing any app from unknown sources, as they may pose some risks.
Q: Do I need to root my device to use Human Evolution Clicker mod apk?
A: No, you do not need to root your device to use Human Evolution Clicker mod apk. The mod apk file works on both rooted and non-rooted devices, so you don’t have to worry about that. However, if you have a rooted device, you may enjoy some extra benefits, such as faster performance and more customization options.
Q: Will Human Evolution Clicker mod apk affect the original game?
A: No, Human Evolution Clicker mod apk will not affect the original game, as it is a separate app that does not overwrite or interfere with the original game. You can have both apps on your device and play them separately. However, you should not use the same account or data for both apps, as they may cause some conflicts or errors.
Q: Can I update Human Evolution Clicker mod apk?
A: Yes, you can update Human Evolution Clicker mod apk, but not from the official app store. You will have to download and install the latest version of the mod apk file from the same source you used before. You should also backup your data before updating, as you may lose some progress or settings.
Q: Can I play Human Evolution Clicker mod apk online or offline?
A: You can play Human Evolution Clicker mod apk both online and offline, depending on your preference. The game does not require an internet connection to run, so you can play it offline without any problems. However, if you want to access some online features, such as leaderboards, achievements, or social media integration, you will need an internet connection.
bc1a9a207d