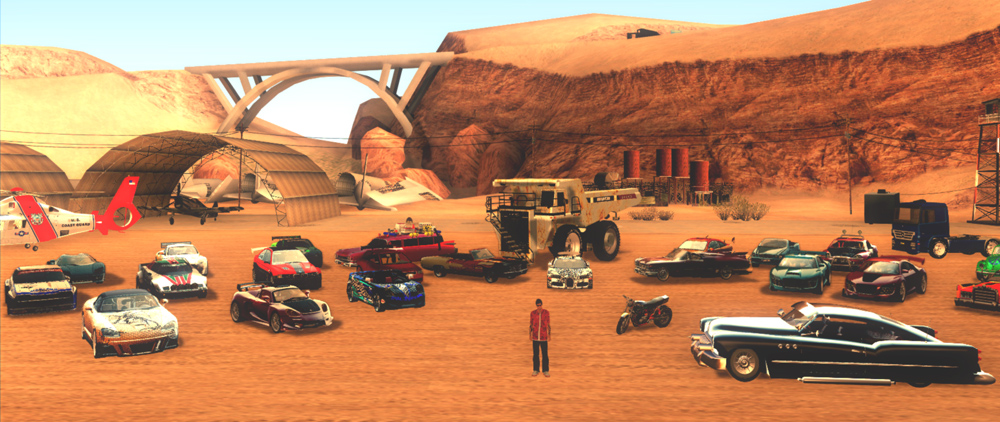
GTA San Andreas Car Mod: How to Enhance Your Driving Experience
GTA San Andreas is one of the most popular and influential games of all time. It is an open-world action-adventure game that lets you explore a fictional version of California in the early 1990s. You can drive, shoot, fight, and do various missions as you follow the story of Carl Johnson, a former gangster who returns to his hometown after his mother’s death.
One of the best features of GTA San Andreas is its modding community. Modding is the process of modifying or adding new content to a game using external tools and files. There are thousands of mods available for GTA San Andreas, ranging from new weapons, skins, maps, missions, scripts, and more. But one of the most popular types of mods is car mods.
Car mods are modifications that change or add new vehicles to the game. They can improve the appearance, performance, sound, and handling of the cars in GTA San Andreas. They can also add new cars from other games or real life to the game. Car mods can make your driving experience more fun, realistic, and diverse.
How to Install Car Mods to GTA San Andreas
Requirements
Before you install any car mod to GTA San Andreas, you need to have some basic requirements. These are:
A copy of GTA San Andreas for PC. You can buy it from Steam or other online platforms.
A mod installer tool such as San Andreas Mod Installer or IMG Tool. These tools make it easy to install and uninstall car mods without messing up your game files.
A backup of your game files. This is important in case something goes wrong or you want to restore your original game. You can use a tool like GTASA Backup or simply copy your game folder to another location.
Steps
Once you have these requirements, you can follow these steps to install any car mod to GTA San Andreas:
Download the car mod you want from a trusted website. Some of the best websites for GTA San Andreas car mods are GTAinside, GTAall, and GTA World Mods. Make sure the mod is compatible with your game version and has good ratings and reviews.
Extract the files from the zip or rar archive using a tool like WinRAR or 7-Zip. You should see files with extensions like .dff, .txd, .col, .ide, or .img. These are the files that contain the car model, texture, collision, and data.
Run the mod installer tool and follow the instructions. Depending on the tool you use, you may need to select your game folder, the mod file, and the car you want to replace in the game. Some tools will automatically detect these for you. You can also choose to create a backup of your original car file before installing the mod.
Select the car you want to replace in the game. You can either replace an existing car in the game with the modded car, or add a new car slot using a tool like Fastman92 Limit Adjuster. If you replace an existing car, make sure it has a similar size and class as the modded car. For example, you can replace a sports car with another sports car, but not with a truck or a plane.
Choose the modded car file and install it. The mod installer tool will copy and replace the necessary files in your game folder. You may need to rebuild your archive if you use IMG Tool.
Start the game and enjoy your new car. You can find your new car in the locations where the original car spawns, or use a cheat code or a trainer to spawn it anywhere. You can also customize your new car in any garage or tuning shop.
Best Car Mods for GTA San Andreas
There are hundreds of car mods for GTA San Andreas, but some of them stand out for their quality, variety, and compatibility. Here are some of the best car mods for GTA San Andreas that you should try:
Real Cars for GTA-SA
This is a comprehensive mod that replaces over 100 cars in GTA San Andreas with realistic models from GTA V and other games. It features high-quality textures, sounds, and handling for each car. It also adds new license plates, wheels, and logos to make them look more authentic. This mod is compatible with GTA-SA v1.01 EU support, which means you can use it with the latest patches and fixes.
GTA V Cars Pack for GTA San Andreas
This is a collection of 40 cars from GTA V that can be added to GTA San Andreas without replacing any existing vehicles. It features custom tuning parts, lights, and damage effects for each car. It also supports CLEO scripts and SAMP multiplayer mode, which means you can use them with various mods and online servers. This mod is easy to install and uninstall using San Andreas Mod Installer.
NFS Carbon Cars Pack for GTA San Andreas
This is a pack of 25 cars from Need for Speed Carbon that can be installed in GTA San Andreas. It features realistic physics, sounds, and performance for each car. It also supports ENB Series graphics mod and DYOM missions, which means you can enhance your graphics and gameplay with these cars. This mod is compatible with most versions of GTA San Andreas and can be installed using IMG Tool.
Conclusion
GTA San Andreas is a great game that can be made even better with car mods. Car mods can improve your driving experience by adding new and improved vehicles to the game. They can also make your game more realistic, diverse, and fun.
However, before you install any car mod, make sure you have the requirements and follow the steps carefully. You should also backup your game files and use a mod installer tool to avoid any errors or crashes. And remember to always download car mods from trusted websites and check their ratings and reviews.
So what are you waiting for? Try out some of these amazing car mods for GTA San Andreas and enjoy your ride!
Frequently Asked Questions
Q: Can I use car mods on GTA San Andreas for consoles or mobile devices?
A: No, car mods are only available for GTA San Andreas for PC. You cannot use them on consoles or mobile devices.
Q: Can I use multiple car mods at the same time?
A: Yes, you can use multiple car mods at the same time as long as they do not conflict with each other or exceed the game’s limits. You can use tools like Fastman92 Limit Adjuster or Mod Loader to manage your mods.
Q: How can I uninstall a car mod from GTA San Andreas?
A: You can uninstall a car mod from GTA San Andreas by using the same mod installer tool that you used to install it. You can also restore your backup files or reinstall the game if you want to remove all mods.
Q: How can I find more car mods for GTA San Andreas?
A: You can find more car mods for GTA San Andreas by browsing the websites mentioned above or by searching on Google or YouTube. You can also join online forums and communities where modders and players share their creations and recommendations.
Q: How can I make my own car mod for GTA San Andreas?
A: You can make your own car mod for GTA San Andreas by using tools like ZModeler, 3ds Max, Photoshop, or GIMP. You can also follow tutorials and guides online that teach you how to create and edit car models, textures, and data.
Windows 10 Pro is one of the editions of Windows 10, Microsoft’s popular operating system for PCs. It offers more advanced security and business features than Windows 10 Home, such as BitLocker encryption, Remote Desktop access, domain join, and more. If you want to install or upgrade your PC to Windows 10 Pro, you might want to download it to a flash drive first. This way, you can have a portable and convenient way to install or upgrade Windows 10 on any compatible PC.
In this article, we will show you how to download Windows 10 Pro to a flash drive using two different methods: Microsoft’s Media Creation Tool and Rufus. We will also show you how to use the flash drive to install or upgrade Windows 10 on your PC. But before we get started, let’s take a look at some of the benefits of Windows 10 Pro over Windows 10 Home, as well as the system requirements and price of Windows 10 Pro.
Introduction
What is Windows 10 Pro and why you might want to download it to a flash drive
Windows 10 Pro is one of the editions of Windows 10 that is designed for professional users, small businesses, and power users. It offers more advanced security and business features than Windows 10 Home, such as BitLocker encryption, Remote Desktop access, domain join, and more. Some of the benefits of Windows 10 Pro over Windows 10 Home are: – BitLocker encryption: This feature allows you to encrypt your hard drive and removable drives, such as USB flash drives, to protect your data from unauthorized access or theft. – Remote Desktop access: This feature allows you to remotely access your PC from another device over the internet, and use it as if you were sitting in front of it. – Domain join: This feature allows you to connect your PC to a corporate or school network, and access shared resources and policies. – Group Policy: This feature allows you to manage and configure the settings and permissions of your PC and other devices on the network. – Hyper-V: This feature allows you to create and run virtual machines on your PC, and test different operating systems and applications without affecting your main system. – Windows Sandbox: This feature allows you to run potentially unsafe applications in a isolated environment, and discard them when you are done. – Windows Update for Business: This feature allows you to control when and how your PC receives updates, and defer or pause them if needed. If you want to install or upgrade your PC to Windows 10 Pro, you might want to download it to a flash drive first. This way, you can have a portable and convenient way to install or upgrade Windows 10 on any compatible PC. You can also use the flash drive as a backup or recovery tool in case something goes wrong with your PC.
What are the system requirements and price of Windows 10 Pro
The system requirements for Windows 10 Pro are the same as for Windows 10 Home. You need a PC with the following specifications: – Processor: 1 gigahertz (GHz) or faster compatible processor or System on a Chip (SoC) – Memory: 1 gigabyte (GB) for 32-bit or 2 GB for 64-bit – Hard drive space: 32 GB or larger hard disk – Graphics card: Compatible with DirectX 9 or later with WDDM 1.0 driver – Display: 800×600 – Internet connection: Required for updates and activation The price of Windows 10 Pro varies depending on where you buy it from. You can buy it directly from Microsoft’s website for $199.99, or from other online retailers or physical stores for different prices. You can also upgrade from Windows 10 Home to Windows 10 Pro for $99.99, or get it for free if you have a valid product key from a previous version of Windows.
How to Download Windows 10 Pro to Flash Drive Using Microsoft’s Media Creation Tool
What is the Media Creation Tool and where to download it
The Media Creation Tool is a free software that Microsoft provides to help users download and create installation media for Windows 10. You can use it to download Windows 10 Pro to a flash drive, as well as to a DVD or an ISO file. You can also use it to upgrade your PC to Windows 10 without losing your files and settings.
To download the Media Creation Tool, you need to visit Microsoft’s website and click on the “Download tool now” button. You will get a file named “MediaCreationTool.exe” that you need to save on your PC.
How to run the tool and select the edition, language, and architecture of Windows 10 Pro
To run the tool, you need to double-click on the “MediaCreationTool.exe” file that you downloaded. You will see a User Account Control prompt asking you if you want to allow the app to make changes to your device. Click on “Yes” to continue.
You will then see a window with the license terms of the software. Read them carefully and click on “Accept” if you agree.
Next, you will see a window with two options: “Upgrade this PC now” and “Create installation media (USB flash drive, DVD, or ISO file) for another PC”. Choose the second option and click on “Next”.
You will then see a window where you can select the edition, language, and architecture of Windows 10 that you want to download. By default, the tool will select the same options as your current PC, but you can change them if you want. Make sure that you select “Windows 10” as the edition, as this will include both Windows 10 Home and Windows 10 Pro. You can also choose between 32-bit or 64-bit architecture, or both. Click on “Next” when you are done.
How to choose a USB flash drive as the destination and start the download process
After selecting the edition, language, and architecture of Windows 10, you will see a window where you can choose the type of media that you want to use. You will have two options: “USB flash drive” and “ISO file”. Choose the first option and click on “Next”.
You will then see a window where you can select the USB flash drive that you want to use. You need to have a USB flash drive with at least 8 GB of free space plugged into your PC. The tool will show you a list of available drives that you can use. Select the one that you want and click on “Next”.
The tool will then start downloading Windows 10 Pro to your flash drive. You will see a progress bar and a percentage showing how much of the download is complete. This may take some time depending on your internet speed and the size of the file. Do not unplug or turn off your PC or flash drive during this process.
When the download is finished, you will see a message saying that your USB flash drive is ready. Click on “Finish” to close the tool. You can now use your flash drive to install or upgrade Windows 10 Pro on your PC.
How to Download Windows 10 Pro to Flash Drive Using Rufus
What is Rufus and where to download it
Rufus is another free software that you can use to download and create bootable USB flash drives for Windows 10. It is faster and more reliable than the Media Creation Tool, and it also supports more formats and options. However, it requires you to download an ISO file of Windows 10 Pro separately, which can be more complicated for some users.
To download Rufus, you need to visit its website and click on the “Download” button. You will get a file named “rufus-x.x.exe” where x.x is the version number of the software. You need to save this file on your PC.
How to download an ISO file of Windows 10 Pro from Microsoft’s website
To download an ISO file of Windows 10 Pro, you need to visit Microsoft’s website and click on the “Download tool now” button under the “Create Windows 10 installation media” section. You will get the same “MediaCreationTool.exe” file that we used in the previous method.
However, instead of running the tool and choosing the “Create installation media” option, you need to choose the “Upgrade this PC now” option. This will start downloading Windows 10 Pro to your PC.
When the download is complete, you will see a window asking you if you want to install Windows 10 now or create installation media for another PC. Choose the second option and click on “Next”.
You will then see a window where you can select the edition, language, and architecture of Windows 10 that you want to create installation media for. Make sure that you select “Windows 10” as the edition, as this will include both Windows 10 Home and Windows 10 Pro. You can also choose between 32-bit or 64-bit architecture, or both. Click on “Next” when you are done.
You will then see a window where you can choose the type of media that you want to use. You will have two options: “USB flash drive” and “ISO file”. Choose the second option and click on “Next”.
You will then see a window where you can select the location where you want to save the ISO file of Windows 10 Pro. Choose a folder on your PC and click on “Save”. The tool will then start creating the ISO file of Windows 10 Pro.
When the creation is finished, you will see a message saying that your ISO file is ready. Click on “Finish” to close the tool. You can now use Rufus to create a bootable USB flash drive from this ISO file.
How to run Rufus and select the USB flash drive, ISO file, and other settings
To run Rufus, you need to double-click on the “rufus-x.x.exe” file that you downloaded. You will see a User Account Control prompt asking you if you want to allow the app to make changes to your device. Click on “Yes” to continue.
You will then see the main window of Rufus, where you can select the USB flash drive, ISO file, and other settings that you want to use. You need to have a USB flash drive with at least 8 GB of free space plugged into your PC. Rufus will automatically detect and select the flash drive, but you can change it if you want.
Next, you need to click on the “SELECT” button next to the “Boot selection” option. This will open a file browser where you can locate and select the ISO file of Windows 10 Pro that you created with the Media Creation Tool. Click on “Open” to confirm your selection.
Rufus will then analyze the ISO file and fill in the rest of the settings for you. You can leave them as they are, or change them if you want. Some of the settings that you can customize are: – Partition scheme: This determines how the flash drive is formatted and how it can boot on different types of PCs. You can choose between MBR (Master Boot Record) or GPT (GUID Partition Table). MBR is compatible with older PCs, while GPT is compatible with newer PCs that use UEFI (Unified Extensible Firmware Interface). – File system: This determines how the files are organized and stored on the flash drive. You can choose between FAT32, NTFS, exFAT, or UDF. FAT32 is compatible with most devices, while NTFS and exFAT support larger files and volumes. UDF is mainly used for optical discs. – Cluster size: This determines how much space is allocated for each file on the flash drive. You can choose between different sizes, such as 512 bytes, 1 KB, 2 KB, 4 KB, etc. The smaller the cluster size, the more efficient the space usage, but the slower the performance. – Volume label: This determines how the flash drive is named and displayed on your PC. You can enter any name that you want, such as “Windows 10 Pro”. – Standard Windows installation: This option allows you to create a standard Windows installation media that can be used to install or upgrade Windows 10 on any PC. – Windows To Go: This option allows you to create a portable Windows operating system that can be run from the flash drive on any PC. – Add fixes for old BIOSes: This option allows you to add some fixes and patches that can help your flash drive boot on older PCs that have outdated BIOSes (Basic Input/Output Systems). – Check device for bad blocks: This option allows you to scan your flash drive for errors and bad sectors that can affect its performance and reliability. – Quick format: This option allows you to format your flash drive quickly and erase all its data. – Create extended label and icon files: This option allows you to create some additional files that can enhance the appearance and identification of your flash drive.
When you are done with the settings, click on the “START” button at the bottom of the window. Rufus will then warn you that all the data on your flash drive will be erased. Click on “OK” to proceed.
How to start the creation of the bootable USB flash drive
Rufus will then start creating the bootable USB flash drive from the ISO file of Windows 10 Pro. You will see a progress bar and a percentage showing how much of the creation is complete. This may take some time depending on the size of the file and the speed of your flash drive. Do not unplug or turn off your PC or flash drive during this process.
When the creation is finished, you will see a message saying that your bootable USB flash drive is ready. Click on “CLOSE” to exit Rufus. You can now use your flash drive to install or upgrade Windows 10 Pro on your PC.
How to Use the Windows 10 Pro Flash Drive to Install or Upgrade Windows 10 on Your PC
How to boot from the USB flash drive and enter the Windows Setup
To use the Windows 10 Pro flash drive to install or upgrade Windows 10 on your PC, you need to boot from the flash drive and enter the Windows Setup. To do this, you need to follow these steps:
Plug the flash drive into your PC and turn it on.
Press the key that opens the boot menu on your PC. This key varies depending on your PC’s manufacturer and model, but it is usually one of the function keys (F1, F2, F12, etc.), the Esc key, or the Del key. You can also check your PC’s manual or website for more information.
Select the USB flash drive from the boot menu and press Enter.
Wait for the Windows logo to appear on your screen.
Select your language, time and currency format, and keyboard or input method, and click on “Next”.
Click on “Install now” to start the installation process.
How to choose the installation type, partition, and product key
After entering the Windows Setup, you will see a window where you can choose the installation type. You will have two options: “Upgrade” and “Custom”. Choose the option that suits your needs:
If you want to upgrade your existing version of Windows to Windows 10 Pro without losing your files and settings, choose “Upgrade”. This option will only work if you are already running a compatible version of Windows, such as Windows 7, 8, or 10 Home.
If you want to install a fresh copy of Windows 10 Pro on your PC or on a different partition, choose “Custom”. This option will erase everything on your selected partition and give you a clean slate.
If you choose “Custom”, you will then see a window where you can select the partition where you want to install Windows 10 Pro. You can also create, delete, or format partitions using the options at the bottom of the window. Be careful not to delete or format any partitions that contain important data or system files. Select the partition that you want and click on “Next”.
You will then see a window where you can enter your product key for Windows 10 Pro. You can find this key on a sticker or a card that came with your purchase of Windows 10 Pro, or in an email or online account if you bought it digitally. Enter your product key and click on “Next”. If you don’t have a product key or you want to activate Windows later, you can click on “I don’t have a product key” and skip this step.
How to follow the instructions and complete the installation or upgrade process
After entering your product key or skipping it, you will see a window with the license terms of Windows 10 Pro. Read them carefully and click on “Accept” if you agree.
You will then see a window with a progress bar and a percentage showing how much of the installation or upgrade is complete. This may take some time depending on your PC’s speed and performance. Do not turn off your PC or flash drive during this process.
Your PC may restart several times during this process. When it does, make sure that you don’t press any keys or select any other boot options. Just let it boot from the flash drive and continue with the installation or upgrade.
When the installation or upgrade is finished, you will see a window where you can customize some settings for your new Windows 10 Pro. You can choose between using an online Microsoft account or a local account to sign in to your PC, set up a PIN or password for security, enable or disable Cortana and other features, adjust your privacy settings, and more. Follow the instructions on the screen and click on “Next” when you are done.
You will then see a window saying that Windows is getting ready for you. Wait for a few minutes until it finishes setting up everything for you.
Congratulations! You have successfully installed or upgraded your PC to Windows 10 Pro using a flash drive. You can now enjoy all the benefits and features of this edition of Windows 10.
Conclusion
In this article, we have shown you how to download Windows 10 Pro to a flash drive using two different methods: Microsoft’s Media Creation Tool and Rufus. We have also shown you how to use the flash drive to install or upgrade Windows 10 Pro on your PC. Here are some tips and recommendations that we have for you:
Make sure that your PC meets the system requirements and has enough free space for Windows 10 Pro.
Make sure that your internet connection is stable and fast enough for downloading Windows 10 Pro to a flash drive.
Make sure that your USB flash drive is large enough, reliable, and free of errors for downloading Windows 10 Pro to it.
Make sure that you have a valid product key for Windows 10 Pro, or that you are eligible for a free upgrade from a previous version of Windows.
Make sure that you backup your important files and data before installing or upgrading Windows 10 Pro on your PC.
Make sure that you follow the instructions carefully and do not interrupt the download or installation process.
We hope that this article has been helpful and informative for you. If you have any questions or feedback, please feel free to leave a comment below. Thank you for reading!
FAQs
Q: Can I use the same USB flash drive to install Windows 10 Pro on multiple PCs?
A: Yes, you can use the same USB flash drive to install Windows 10 Pro on as many PCs as you want, as long as you have a valid product key for each PC.
Q: How long does it take to download Windows 10 Pro to a flash drive?
A: The download time depends on your internet speed, the size of the Windows 10 Pro file, and the speed of your USB flash drive. It can take anywhere from a few minutes to several hours.
Q: How much space do I need on my USB flash drive to download Windows 10 Pro?
A: You need at least 8 GB of free space on your USB flash drive to download Windows 10 Pro. If your flash drive is smaller than that, you will need to use a different one or delete some files from it.
Q: What if I encounter an error or a problem while downloading or installing Windows 10 Pro from a flash drive?
A: If you encounter an error or a problem while downloading or installing Windows 10 Pro from a flash drive, you can try some troubleshooting steps such as checking your internet connection, scanning your flash drive for errors, using a different USB port, or restarting your PC. You can also visit Microsoft’s support website for more help and guidance.
Q: Can I download other versions of Windows 10 from a flash drive?
A: Yes, you can download other versions of Windows 10 from a flash drive, such as Windows 10 Home, Enterprise, or Education. You just need to select the version you want when using the Media Creation Tool or Rufus.
GTA San Andreas Car Mod: How to Enhance Your Driving Experience
GTA San Andreas is one of the most popular and influential games of all time. It is an open-world action-adventure game that lets you explore a fictional version of California in the early 1990s. You can drive, shoot, fight, and do various missions as you follow the story of Carl Johnson, a former gangster who returns to his hometown after his mother’s death.
One of the best features of GTA San Andreas is its modding community. Modding is the process of modifying or adding new content to a game using external tools and files. There are thousands of mods available for GTA San Andreas, ranging from new weapons, skins, maps, missions, scripts, and more. But one of the most popular types of mods is car mods.
Car mods are modifications that change or add new vehicles to the game. They can improve the appearance, performance, sound, and handling of the cars in GTA San Andreas. They can also add new cars from other games or real life to the game. Car mods can make your driving experience more fun, realistic, and diverse.
How to Install Car Mods to GTA San Andreas
Requirements
Before you install any car mod to GTA San Andreas, you need to have some basic requirements. These are:
A copy of GTA San Andreas for PC. You can buy it from Steam or other online platforms.
A mod installer tool such as San Andreas Mod Installer or IMG Tool. These tools make it easy to install and uninstall car mods without messing up your game files.
A backup of your game files. This is important in case something goes wrong or you want to restore your original game. You can use a tool like GTASA Backup or simply copy your game folder to another location.
Steps
Once you have these requirements, you can follow these steps to install any car mod to GTA San Andreas:
Download the car mod you want from a trusted website. Some of the best websites for GTA San Andreas car mods are GTAinside, GTAall, and GTA World Mods. Make sure the mod is compatible with your game version and has good ratings and reviews.
Extract the files from the zip or rar archive using a tool like WinRAR or 7-Zip. You should see files with extensions like .dff, .txd, .col, .ide, or .img. These are the files that contain the car model, texture, collision, and data.
Run the mod installer tool and follow the instructions. Depending on the tool you use, you may need to select your game folder, the mod file, and the car you want to replace in the game. Some tools will automatically detect these for you. You can also choose to create a backup of your original car file before installing the mod.
Select the car you want to replace in the game. You can either replace an existing car in the game with the modded car, or add a new car slot using a tool like Fastman92 Limit Adjuster. If you replace an existing car, make sure it has a similar size and class as the modded car. For example, you can replace a sports car with another sports car, but not with a truck or a plane.
Choose the modded car file and install it. The mod installer tool will copy and replace the necessary files in your game folder. You may need to rebuild your archive if you use IMG Tool.
Start the game and enjoy your new car. You can find your new car in the locations where the original car spawns, or use a cheat code or a trainer to spawn it anywhere. You can also customize your new car in any garage or tuning shop.
Best Car Mods for GTA San Andreas
There are hundreds of car mods for GTA San Andreas, but some of them stand out for their quality, variety, and compatibility. Here are some of the best car mods for GTA San Andreas that you should try:
Real Cars for GTA-SA
This is a comprehensive mod that replaces over 100 cars in GTA San Andreas with realistic models from GTA V and other games. It features high-quality textures, sounds, and handling for each car. It also adds new license plates, wheels, and logos to make them look more authentic. This mod is compatible with GTA-SA v1.01 EU support, which means you can use it with the latest patches and fixes.
GTA V Cars Pack for GTA San Andreas
This is a collection of 40 cars from GTA V that can be added to GTA San Andreas without replacing any existing vehicles. It features custom tuning parts, lights, and damage effects for each car. It also supports CLEO scripts and SAMP multiplayer mode, which means you can use them with various mods and online servers. This mod is easy to install and uninstall using San Andreas Mod Installer.
NFS Carbon Cars Pack for GTA San Andreas
This is a pack of 25 cars from Need for Speed Carbon that can be installed in GTA San Andreas. It features realistic physics, sounds, and performance for each car. It also supports ENB Series graphics mod and DYOM missions, which means you can enhance your graphics and gameplay with these cars. This mod is compatible with most versions of GTA San Andreas and can be installed using IMG Tool.
Conclusion
GTA San Andreas is a great game that can be made even better with car mods. Car mods can improve your driving experience by adding new and improved vehicles to the game. They can also make your game more realistic, diverse, and fun.
However, before you install any car mod, make sure you have the requirements and follow the steps carefully. You should also backup your game files and use a mod installer tool to avoid any errors or crashes. And remember to always download car mods from trusted websites and check their ratings and reviews.
So what are you waiting for? Try out some of these amazing car mods for GTA San Andreas and enjoy your ride!
Frequently Asked Questions
Q: Can I use car mods on GTA San Andreas for consoles or mobile devices?
A: No, car mods are only available for GTA San Andreas for PC. You cannot use them on consoles or mobile devices.
Q: Can I use multiple car mods at the same time?
A: Yes, you can use multiple car mods at the same time as long as they do not conflict with each other or exceed the game’s limits. You can use tools like Fastman92 Limit Adjuster or Mod Loader to manage your mods.
Q: How can I uninstall a car mod from GTA San Andreas?
A: You can uninstall a car mod from GTA San Andreas by using the same mod installer tool that you used to install it. You can also restore your backup files or reinstall the game if you want to remove all mods.
Q: How can I find more car mods for GTA San Andreas?
A: You can find more car mods for GTA San Andreas by browsing the websites mentioned above or by searching on Google or YouTube. You can also join online forums and communities where modders and players share their creations and recommendations.
Q: How can I make my own car mod for GTA San Andreas?
A: You can make your own car mod for GTA San Andreas by using tools like ZModeler, 3ds Max, Photoshop, or GIMP. You can also follow tutorials and guides online that teach you how to create and edit car models, textures, and data.
FR Legends Online No Download: A Unique Drifting Game Experience
If you are a fan of racing games, you might have heard of FR Legends, a popular drifting game that is available on mobile devices. But did you know that you can also play this game on your PC without downloading anything? That’s right, you can enjoy this unique drifting game experience online with no download required. In this article, we will tell you everything you need to know about FR Legends online no download, including how to play it on PC, what features it offers, what tips and tricks you can use, what are the pros and cons of playing it online, and more. So buckle up and get ready to drift!
How to Play FR Legends Online No Download on PC
One of the best things about FR Legends online no download is that you can play it on your PC without having to install anything on your device. This means that you can save storage space, avoid malware risks, and enjoy faster loading times. But how can you play this game on your PC? Here are the simple steps
One of the best things about FR Legends online no download is that you can play it on your PC without having to install anything on your device. This means that you can save storage space, avoid malware risks, and enjoy faster loading times. But how can you play this game on your PC? Here are the simple steps:
Step 1: Download and install an emulator like BlueStacks or Games.lol. An emulator is a software that allows you to run mobile apps on your PC. You can download BlueStacks from https://www.bluestacks.com/ or Games.lol from https://games.lol/. Both of these emulators are free, safe, and easy to use.
Step 2: Launch the emulator and search for FR Legends in the app store. Once you have installed the emulator, open it and look for the app store icon on the home screen. Click on it and type FR Legends in the search bar. You will see the game icon appear in the results.
Step 3: Install and run FR Legends on your PC and enjoy the game. Click on the game icon and follow the instructions to install it on your emulator. After the installation is complete, you can launch the game and start playing. You can use your mouse and keyboard to control the game, or you can also connect a gamepad or a steering wheel for a more immersive experience.
Features of FR Legends Online No Download
FR Legends online no download is not just a simple racing game. It is a game that lets you experience the thrill of drifting like never before. Here are some of the features that make this game stand out from other racing games:
Feature 1: Realistic drifting physics and controls. FR Legends online no download uses a sophisticated physics engine that simulates the behavior of real cars when they drift. You can feel the weight transfer, the tire grip, the inertia, and the centrifugal force as you slide your car around corners. You can also adjust the steering sensitivity, angle, and feedback to suit your preference.
Feature 2: Customizable cars and tracks. FR Legends online no download lets you customize your car in every aspect, from the engine to the body kit, from the wheels to the paint, from the stickers to the suspension. You can create your own unique drift machine that reflects your personality and style. You can also choose from different tracks that vary in difficulty, layout, and scenery. You can even create your own track using the track editor feature.
Feature 3: Various game modes and challenges. FR Legends online no download offers different game modes and challenges that test your drifting skills and keep you entertained. You can play solo or with friends in the multiplayer mode, where you can compete against other players from around the world. You can also play in the career mode, where you can complete missions, earn money, and unlock new cars and parts. You can also play in the freestyle mode, where you can drift freely and perform tricks and stunts.
Tips and Tricks for FR Legends Online No Download
If you want to master FR Legends online no download, you need to practice a lot and learn some tips and tricks that can help you improve your drifting performance. Here are some of them:
Tip 1: Choose the right steering settings for your preference. FR Legends online no download allows you to choose between two steering modes: tilt or touch. Tilt mode lets you steer your car by tilting your device left or right, while touch mode lets you steer your car by tapping on the left or right side of the screen. You can also adjust the steering sensitivity and angle in the settings menu. Experiment with different settings until you find the one that works best for you.
Tip 2: Practice drifting in the practice mode before competing. Drifting is not easy to master, especially if you are new to this game. That’s why it is recommended that you practice drifting in the practice mode before entering any competitions. In this mode, you can drift without any pressure or time limit, and you can also see your drift score and angle on the screen. This will help you get familiar with the game mechanics and improve your drifting technique.
Tip 3: Use the handbrake and throttle wisely to control your drift angle and speed. One of the most important skills in drifting is knowing how to use the handbrake and throttle properly. The handbrake is used to initiate a drift by locking up the rear wheels and making the car slide sideways. The throttle is used to control the speed and angle of the drift by applying more or less gas. You need to balance these two inputs to maintain a smooth and stable drift. If you use too much handbrake, you might spin out or lose momentum. If you use too much throttle, you might oversteer or hit the wall. Practice using the handbrake and throttle in different situations and see how they affect your drift.
Pros and Cons of FR Legends Online No Download
Like any other game, FR Legends online no download has its pros and cons. Here are some of them:
Pros
Cons
Fun and addictive gameplay. FR Legends online no download is a game that will keep you hooked for hours with its exciting and challenging drifting action. You will never get bored of drifting your car around different tracks and competing with other players.
Requires a stable internet connection. Since FR Legends online no download is an online game, you need to have a reliable internet connection to play it. If your connection is slow or unstable, you might experience lag, disconnects, or errors while playing.
High-quality graphics and sound effects. FR Legends online no download has impressive graphics and sound effects that make the game more realistic and immersive. You can see the details of your car, the smoke from your tires, the sparks from your bumper, and the damage from your collisions. You can also hear the roar of your engine, the screech of your brakes, the cheers of the crowd, and the comments of the announcer.
May have some bugs and glitches. FR Legends online no download is not a perfect game, and it may have some bugs and glitches that can affect your gameplay. For example, you might encounter some crashes, freezes, or errors while playing. You might also find some bugs in the physics, graphics, or sound of the game.
Free to play and download. FR Legends online no download is a game that you can play and download for free. You don’t have to pay anything to enjoy this game on your PC. You can also access all the features and content of the game without spending any money.
May consume a lot of battery and storage space. FR Legends online no download is a game that can consume a lot of battery and storage space on your device. Since it is an online game, it requires constant internet access, which can drain your battery quickly. It also has high-quality graphics and sound effects, which can take up a lot of storage space on your emulator.
Conclusion
FR Legends online no download is a game that will give you a unique drifting game experience on your PC. You can play this game without downloading anything on your device, and enjoy its realistic drifting physics and controls, customizable cars and tracks, various game modes and challenges, fun and addictive gameplay, high-quality graphics and sound effects, and free to play and download features. However, you also need to be aware of its drawbacks, such as requiring a stable internet connection, having some bugs and glitches, and consuming a lot of battery and storage space. If you are looking for a game that will let you drift like a pro, then FR Legends online no download is the game for you.
FAQs
Q1: Is FR Legends online no download safe to play?
A1: Yes, FR Legends online no download is safe to play as long as you download it from a trusted source like BlueStacks or Games.lol. These emulators are verified by Google Play and have millions of users worldwide. They also have security features that protect your device from malware and viruses.
Q2: Can I play FR Legends online no download with friends?
A2: Yes, you can play FR Legends online no download with friends by joining or creating a room in the multiplayer mode. You can also chat with other players in the game.
Q3: How can I get more money and gems in FR Legends online no download?
A3: You can get more money and gems in FR Legends online no download by completing missions, winning battles, watching ads, or making in-app purchases. You can use money and gems to buy new cars, parts, decals, and more.
Q4: How can I customize my car in FR Legends online no download?
A4: You can customize your car in FR Legends online no download by going to the garage menu and choosing from various options like engine swaps, body kits, wheels, tires, paint, stickers, and more. You can also adjust the suspension, camber, toe, gear ratio, and other settings to suit your driving style.
Q5: What are some of the best cars in FR Legends online no download?
A5: Some of the best cars in FR Legends online no download are the S13, AE86, E30, RX7, GT86, BRZ, S15, and R34. These cars have high performance, handling, and drifting capabilities.