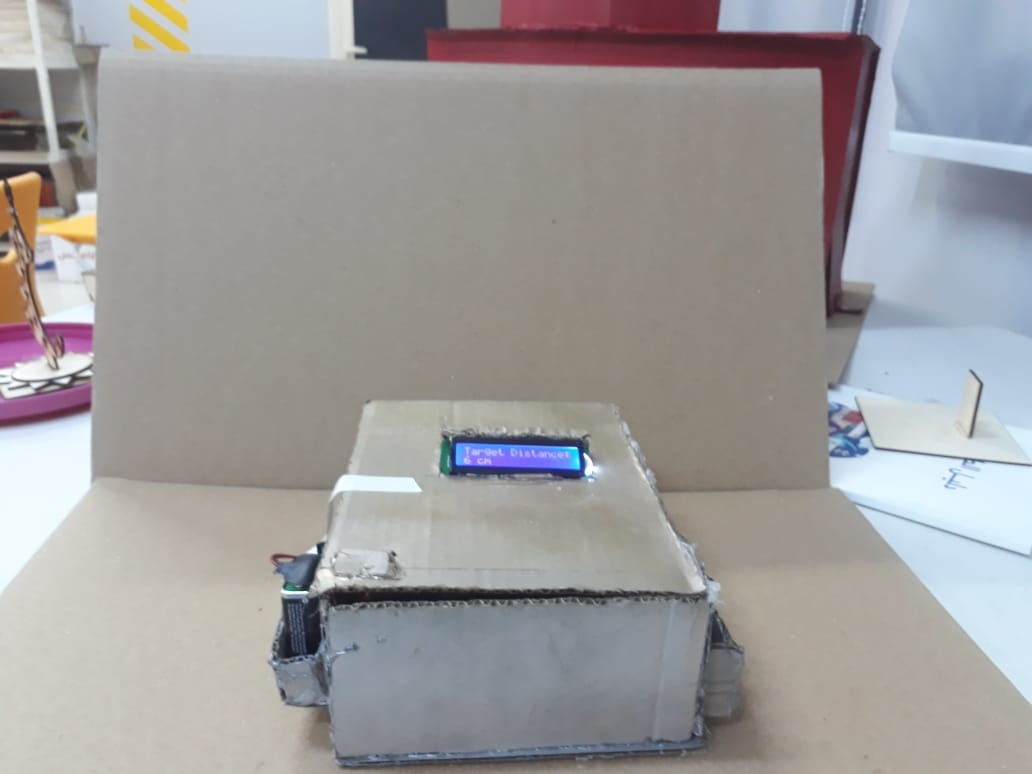
قياس مسافة

نبذة:
اسم المدرسة/ ثانوية سالم العطاس اشراف المعلم / عصام حمزي المنفذون / محمود بصيلي احمد سويدي إيهاب سوديالاكواد البرمجية
/*
HC-SR04 Ultrasonic Sensor with LCD dispaly
HC-SR04 Ultrasonic Sensor
VCC to Arduino 5V
GND to Arduino GND
Echo to Arduino pin 12
Trig to Arduino pin 13
LCD Display (I used JHD162A)
VSS to Arduino GND
VCC to Arduino 5V
VEE to Arduino GND
RS to Arduino pin 11
R/W to Arduino pin 10
E to Arduino pin 9
DB4 to Arduino pin 2
DB5 to Arduino pin 3
DB6 to Arduino pin 4
DB7 to Arduino pin 5
LED+ to Arduino 5V
LED- to Arduino GND
Modified by Ahmed Djebali (June 1, 2015).
*/
#include <LiquidCrystal.h> //Load Liquid Crystal Library
LiquidCrystal LCD(11,10,9,2,3,4,5); //Create Liquid Crystal Object called LCD
#define trigPin 13 //Sensor Echo pin connected to Arduino pin 13
#define echoPin 12 //Sensor Trip pin connected to Arduino pin 12
//Simple program just for testing the HC-SR04 Ultrasonic Sensor with LCD dispaly
//URL:
void setup()
{
pinMode(trigPin, OUTPUT);
pinMode(echoPin, INPUT);
LCD.begin(16,2); //Tell Arduino to start your 16 column 2 row LCD
LCD.setCursor(0,0); //Set LCD cursor to upper left corner, column 0, row 0
LCD.print(“Target Distance:”); //Print Message on First Row
}
void loop() {
long duration, distance;
digitalWrite(trigPin, LOW);
delayMicroseconds(2);
digitalWrite(trigPin, HIGH);
delayMicroseconds(10);
digitalWrite(trigPin, LOW);
duration = pulseIn(echoPin, HIGH);
distance = (duration/2) / 29.1;
LCD.setCursor(0,1); //Set cursor to first column of second row
LCD.print(” “); //Print blanks to clear the row
LCD.setCursor(0,1); //Set Cursor again to first column of second row
LCD.print(distance); //Print measured distance
LCD.print(” cm”); //Print your units.
delay(250); //pause to let things settle
}
1- ربط سلك بين vin و الجهة الموجبة في لوح التوصيل
2- ربط وضع الشاشة في اللوح والأفضل ان تكون في البداية او النهاية
3- ربط سلك بين vss والجهة السالبة في لوح التوصيل
4- ربط سلك بين vdd والجهة الموجبة في لوح التوصيل
5- ربط سلك بين vo والجهة السالبة في لوح التوصيل
6- ربط سلك بين RS و11 PIN في الاردوينو
7- ربط سلك بين RW و 10 PIN في الاردوينو
8- ربط سلك بين E و 9 PIN في الاردوينو
10- ربط سلك بين D4 و 2 PIN في الاردوينو
11- ربط سلك بين D5 و 3 PIN في الاردوينو
12- ربط سلك بين D6 و 4 PIN في الاردوينو
13- ربط سلك بين D7 و 5 PIN في الاردوينو
14- ربط سلك بين A والجهة السالبة في لوح التوصيل
15- ربط سلك بين K والجهة الموجبة في لوح التوصيل
16- وضع الحساس في لوح التوصيل
17- ربط سلك بين VCC والجهةالموجبة في لوح التوصيل
18- ربط سلك بين GND والجهة السالبة في لوح التوصيل
19- ربط سلك بين ECHO والجهة PIN12 في الاردوينو
20- ربط سلك بين TRIG والجهة PIN13 في الاردوينو
21- ربط الادوينو والجهاز لكتابة الاكواد وتفعيلها
22- كتابة الاكواد الموجودة اسفل